
Circuit Case Design
Challenge: Design a prototype casing for a wearable cough detecting device for asthma patients. The process to make the cases should be quick, easy and repeatable. The case itself should be flexible, have minimum thickness while protecting the electronics inside, have slots for battery, SD card and USB port.
Solution: A silicone rubber casing for two circuit boards. The circuit boards are placed in a 3D printed mold and held in the place with inserts that also create slots for the battery, SD card and USB port. The silicone is poured into the mold then cured for 5 to 7 hours.
Logistics: 8 weeks, independent project, 9 iterations
My role: Design casing molds in Solid Works; use 3D printing and silicone rubber to develop prototypes; material research
Lesson Learned: Mold design; importance of prototyping and multiple iterations
Media coverage: "Child-centered innovation." New Hampshire Business Review. Accessed December 13, 2017.
http://www.nhbr.com/November-11-2016/Child-centered-innovation/.
Design Process

Looks-like prototype

Design notes

View showing hidden lines of mold

View showing hidden lines of mold

Earlier iteration

Needed to pour mould twice

Not an ergonomic shape

Inserts VS platform, inserts proved to be more effective

So close, but not quite

Making the casing

3D printed mold with circuit boards held in place by inserts
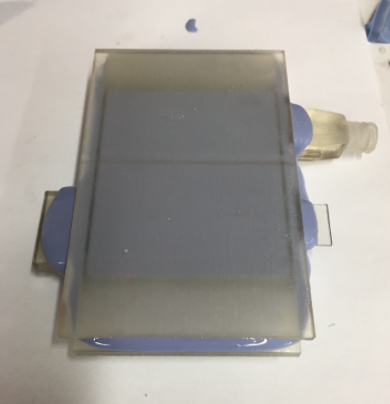
Pour the silicone rubber into the mold and leave to cure for 5 to 7 hours


Mold drawing with dimensions

Solid works model of casing mold with room for two circuit boards that are held in place by inserts

Two part mould

Trying different shapes for casing